
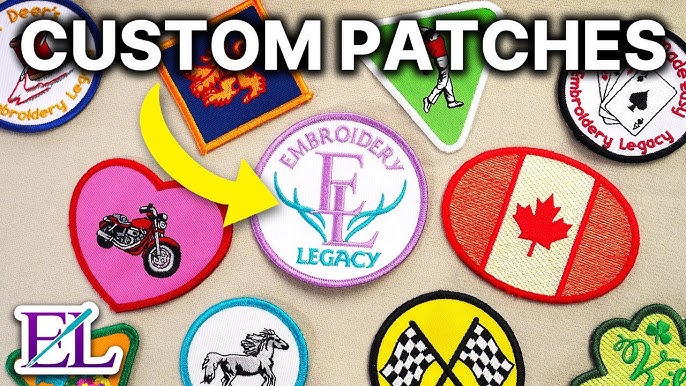
If you’ve landed here, it means you’re looking for smart and practical ways to design a custom patch that truly stands out. The design phase plays a crucial role in turning a simple idea into a visually appealing badge that reflects your identity. Whether you’re aiming to enhance your clothing or add personality to your accessories, this guide will help you craft patches that match your vision perfectly.
Creating the perfect patch isn’t just about creativity—it’s about making the right decisions at every step. From size and color to shape and finishing, each element matters. In this guide, we’ll walk you through the entire process so you can design patches that not only look great but also serve their purpose effectively.
Let’s get started!
The Right Size For Your Patch
There’s no universal size that fits every patch. The ideal dimensions depend on where you plan to use it and how detailed your design is. If your patch includes text or multiple design elements, going for a larger size will ensure everything remains clear and visible. On the other hand, smaller patches are perfect for minimal and subtle designs.
Here’s a quick breakdown:
Small:
Typically around 2 to 4 inches, this size works well for simple designs or compact branding. It’s ideal for caps, sleeves, or small accessories where space is limited.
Medium:
Ranging from 4 to 6 inches, this is a balanced option suitable for logos, artwork, or short text. It’s versatile and fits well on backpacks, jackets, and medium-sized items.
Large:
Anything above 6 inches falls into this category. Large patches are perfect for bold designs with intricate details and are commonly used on jacket backs or hoodies.
Colours That Make Your Custom Patch Stand Out
Choosing the right colors can make a huge difference in how your patch is perceived. Your color selection should reflect your message, brand identity, and target audience. It’s always a good idea to experiment with combinations before finalizing your design.
Here are some helpful tips:
Bright & Vibrant Colors:
Colors like yellow, orange, green, and blue naturally grab attention and make your patch pop.
High Contrast Combinations:
Using contrasting colors such as black and white or blue and yellow enhances visibility and makes your design more eye-catching.
Match With Background:
Always consider the surface where the patch will be applied. Selecting colors that contrast well with the background ensures your design doesn’t fade or blend in.
Common Patch Shapes That Complement Your Design
Your patch shape plays a big role in defining its overall look. While you can experiment with unique and creative shapes, some classic options always work well and provide a clean finish.
Here are a few popular choices:
Circle:
Simple and clean, circular patches are perfect for logos or centered designs.
Square or Rectangle:
These shapes are ideal for text-heavy designs or structured layouts, keeping everything neat and organized.
Oval:
A slightly elongated version of the circle, great for wider logos or designs that need more horizontal space.
Shield:
Perfect for bold and strong designs, especially for emblems, badges, or crest-style patches.
The Backing Options For Patch Attachment
The backing you choose determines how your patch will be applied and how long it will last. Each option comes with its own benefits depending on your needs and usage.
Sew-On Backing:
A durable and permanent option where the patch is stitched onto the fabric. Best for long-term use.
Hook-And-Loop Backing:
Commonly known as Velcro, this option allows you to attach and remove patches easily. Ideal for uniforms or interchangeable designs.
Self-Adhesive Backing:
A quick solution that sticks instantly but may not last as long as other methods.
Iron-On Backing:
Activated with heat, this backing is convenient and easy to apply, though not as strong as sewing.
Border Types That Align With Your Patch Art
Borders give your patch a clean and finished look while also protecting the edges from damage.
Merrow Border:
A traditional stitched border that works best with simple shapes like circles, squares, and rectangles. It provides a thick, rounded edge.
Laser Cut Border:
This method uses heat to seal the edges, making it ideal for complex or custom shapes with sharp details. It gives a sleek and modern finish.
Readable Fonts For Small And Medium Size Patches
Typography is an essential part of your patch design, especially when working with smaller sizes. Choosing the right font ensures your text remains clear and readable.
Here are some reliable font options:
Arial:
Simple, clean, and highly readable even in small sizes.
Helvetica:
A professional and widely-used font that looks great on patches.
Times New Roman:
A classic serif font that works well across all patch sizes.
Calibri:
Modern and neat, making it a great choice for branding purposes.
Always make sure your text size and spacing are well-balanced. Even the best font can become unreadable if it’s too small or too crowded. Keep your lettering clear so it can be easily read from a distance.
Wrapping Up
Designing a custom patch is all about combining creativity with attention to detail. Every choice you make—from size and color to shape and font—contributes to the final look of your patch.
Whether you want a subtle design or a bold statement piece, focusing on the right elements will help bring your vision to life. Keep your goal in mind, experiment with ideas, and don’t be afraid to get creative.
With the right approach, you can design custom patches that are not only visually appealing but also truly memorable.